Chapter 4: Agency Settings
Overview
Agency Settings is where your organization's foundational information is configured and maintained. This chapter covers all aspects of agency profile management, including:
- Agency information and identifiers (NPI, CCN, Tax ID)
- Contact and address details
- Subscription tier management
- Security settings
- Agency branding and logos
Who Should Read This Chapter:
- Agency Administrators
- Super Administrators
- Sales & Onboarding staff (during initial setup)
Prerequisites:
- Completed sandbox signup (Chapter 1)
- Active user account with Agency Administrator or Super Administrator role
4.1 Accessing Agency Settings
Navigation Path
- From the Dashboard: Click the Settings icon (gear icon) in the top-right header bar
- Select "Agency Settings" from the dropdown menu
- The Edit Agency modal will open
Alternative Access:
- Super Administrators can access agency settings for any agency in their scope
- Regular Agency Administrators can only edit their own agency
4.2 Agency Information Tab
The Agency Information section contains your organization's core business identifiers and contact details. This information appears on official documents, claims, and communications.
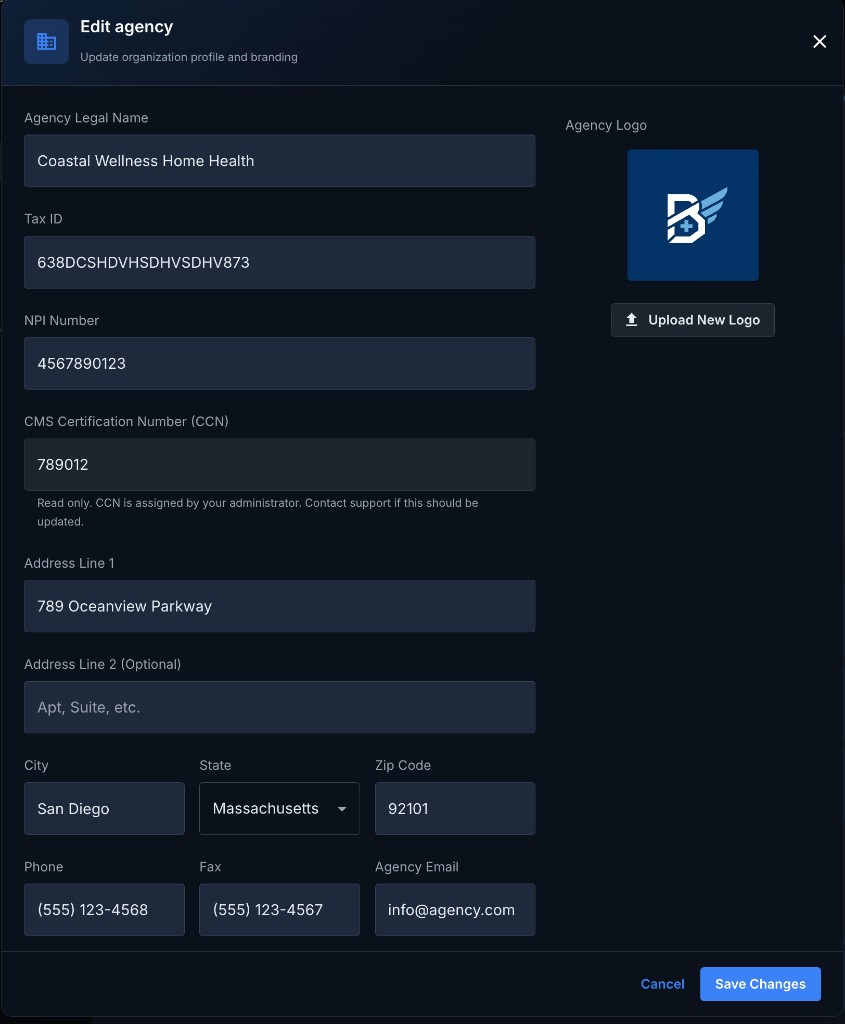
4.2.1 Required Fields
Agency Name
- Purpose: Your organization's legal or DBA (Doing Business As) name
- Format: Text (up to 255 characters)
- Examples: "Austin Home Health Services", "Caring Hands Agency"
- Note: This name appears on all claims, reports, and patient communications
National Provider Identifier (NPI)
- Purpose: Unique 10-digit identification number for healthcare providers
- Format: Exactly 10 numeric digits (e.g.,
1234567890) - Required For: Medicare/Medicaid billing, claims submission
- Validation: Must pass Luhn algorithm check
- Where to Find: Obtain from the NPPES NPI Registry
Common Mistakes:
- ❌ Using a 9-digit or 11-digit number
- ❌ Including dashes or spaces
- ✅ Correct format:
1234567890
CMS Certification Number (CCN)
- Purpose: 6-character code certifying your agency to provide Medicare services
- Format: 6 alphanumeric characters (e.g.,
12345A) - Required For: Going live in production, Medicare billing
- Validation: Must be exactly 6 characters
- Note: Only certified Home Health Agencies have a CCN
Sandbox vs Production:
- Sandbox: CCN is optional (agencies can test without certification)
- Production: CCN is mandatory for Medicare billing and going live
Related Features:
- Without a CCN, the agency remains in Sandbox mode
- CCN is required to complete the "Go Live" process (see Chapter 13)
Tax Identification Number (Tax ID / EIN)
- Purpose: Your organization's federal tax ID (Employer Identification Number)
- Format: 9 digits, typically formatted as
12-3456789 - Required For: Tax reporting, financial documentation, payer enrollment
- Where to Find: Obtained from the IRS during business formation
4.2.2 Contact Information
Primary Contact Person
- Field: Full name of the primary point of contact
- Purpose: Who to reach for administrative matters
- Example: "Sarah Johnson", "Dr. Michael Chen"
Phone Number
- Format: (###) ###-####
- Purpose: Primary agency phone number
- Note: Used for urgent communications, payer contacts, and patient inquiries
Email Address
- Format: Valid email address
- Purpose: Primary agency email for official communications
- Note: System notifications, claim correspondences, and alerts are sent here
Address
Complete physical address including:
- Street Address: Physical location (P.O. boxes generally not accepted for home health)
- City: City name
- State: Two-letter state abbreviation (e.g., TX, CA, NY)
- ZIP Code: 5-digit or 9-digit format (12345 or 12345-6789)
Important:
- This address must match the address on file with CMS and state licensing boards
- Used for official correspondence and regulatory filings
4.3 Subscription & Billing
The Subscription section displays your current plan details and provides access to upgrade options.
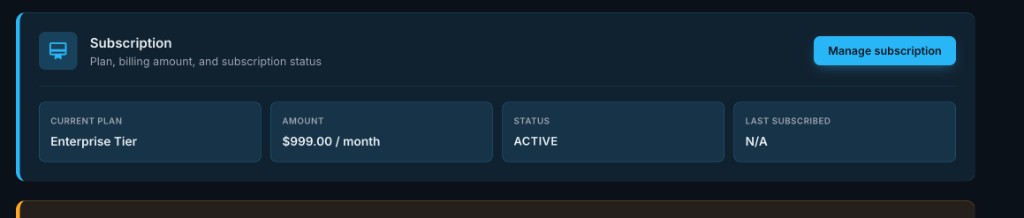
Screenshot 5: Subscription section showing current plan, billing amount, and status
4.3.1 Current Subscription Information
You'll see a card displaying:
- CURRENT PLAN: Your subscription tier (e.g., "Enterprise Tier")
- AMOUNT: Monthly billing amount (e.g., "$999.00 / month")
- STATUS: Subscription status (e.g., "ACTIVE")
- LAST SUBSCRIBED: Date of subscription or upgrade (e.g., "N/A" for sandbox)
- Manage subscription button to view more details or change plans
4.3.2 Subscription Tiers
Your agency is assigned one of the following subscription tiers:
| Tier | Description | User Limit | Key Features |
|---|---|---|---|
| Sandbox | Free trial environment | Unlimited users | Demo data, full feature access, no billing |
| Test | Development/testing account | 5 users | Full features, no production data |
| Growth | Small to medium agencies | 20 users | Standard features, basic support |
| Pro | Mid-sized agencies | 50 users | Custom Role Builder, priority support |
| Enterprise | Large multi-branch agencies | Unlimited users | Custom Role Builder, dedicated support, SLA |
4.3.3 Managing Your Subscription
Click the Manage subscription button to open the Subscription & Billing modal:
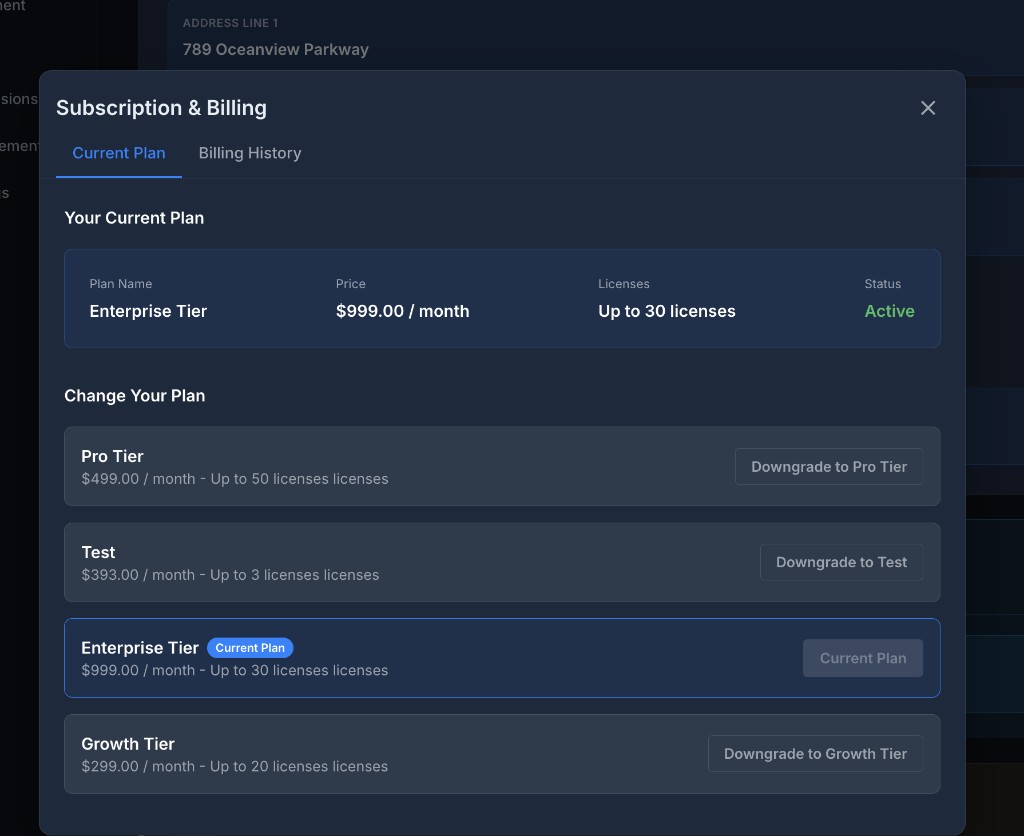
Screenshot 6: Subscription & Billing modal showing Current Plan tab and Change Your Plan options
The modal has two tabs:
- Current Plan: View your active subscription details
- Billing History: View past invoices and payment records
Your Current Plan Section:
- Plan Name: (e.g., "Enterprise Tier")
- Price: Monthly cost
- Licenses: Number of user licenses included (e.g., "Up to 30 licenses")
- Status: Active/Inactive
Change Your Plan Section:
Available plan options displayed with:
- Plan name and pricing
- Number of licenses
- Upgrade/Downgrade buttons for each tier
To Change Your Plan:
- Click the Downgrade to [Plan Name] or Upgrade to [Plan Name] button
- Confirm your selection
- Complete billing information if upgrading
- Your subscription will be updated within 1-2 business days
Note: Upgrading from Sandbox to Production requires:
- A valid CCN (CMS Certification Number)
- Paid subscription (Growth, Pro, or Enterprise)
- Completion of the "Go Live" process (see Chapter 13)
4.4 Branding & Logo Upload
4.4.1 Agency Logo
Upload your agency's logo to personalize the system interface:
![]()
Screenshot 2: Agency Logo section showing current logo and Upload New Logo button
-
Where It Appears:
- Left sidebar (replaces default Betasky logo)
- Printed reports and documents
- Patient-facing forms and communications
-
File Requirements:
- Format: PNG, JPG, or SVG
- Recommended Size: 200px x 60px (or similar aspect ratio)
- Max File Size: 2 MB
- Background: Transparent PNG recommended
How to Upload:
- In the Edit Agency modal, scroll to the Branding section
- Click Upload New Logo
- Select your image file
- Preview the logo
- Click Save Changes
Result:
- Your logo will immediately appear in the left sidebar
- If no logo is uploaded, the default Betasky logo is shown
4.5 Security Settings

Screenshot 3: Security section with Change password button
4.5.1 Changing Your Password
To update your password:
- Scroll to the Security section
- Click Change password button
- The Change Password modal opens
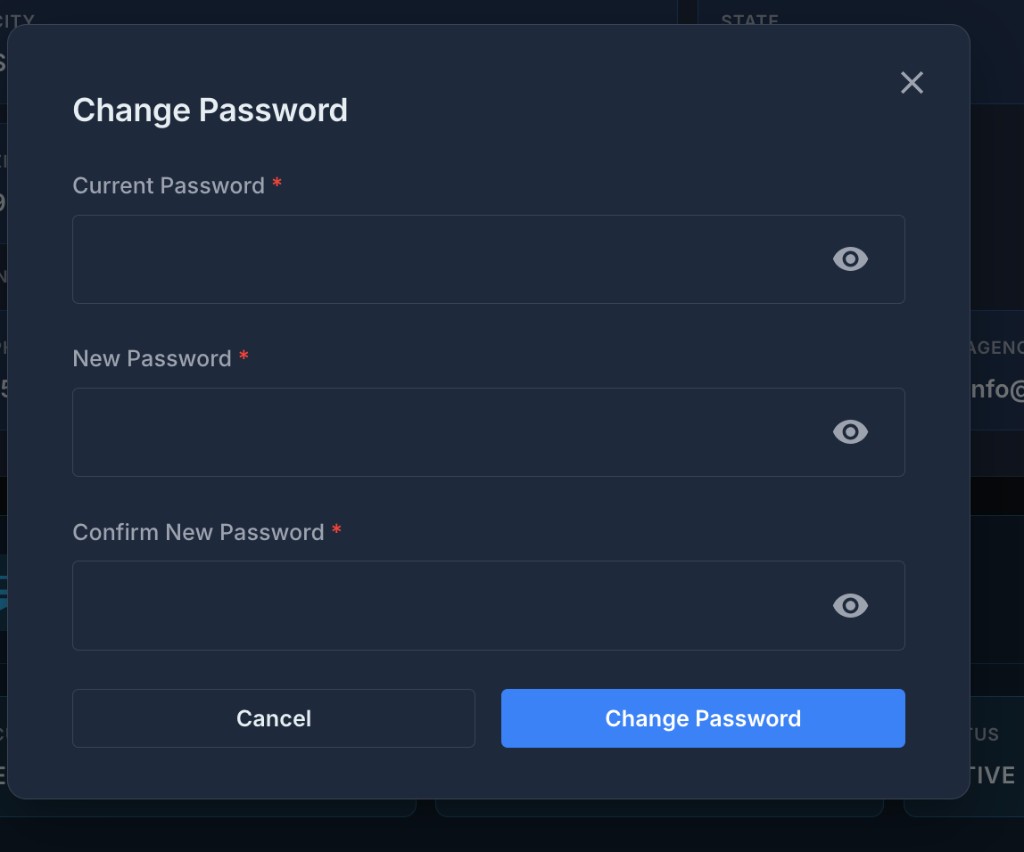
Screenshot 4: Change Password modal showing current password, new password, and confirm password fields
- Enter your Current Password
- Enter your New Password
- Confirm the new password in Confirm New Password field
- Click Change Password button
Password Requirements:
- Minimum 8 characters
- Must contain uppercase and lowercase letters
- Must contain at least one number
- Must contain at least one special character
4.6 Saving and Canceling Changes
Saving Your Updates
- After editing any field, click Save Changes at the bottom of the modal
- A Success toast notification will confirm: "Agency settings updated successfully"
- Changes take effect immediately
Canceling Edits
- Click Cancel or the X icon in the top-right of the modal
- All unsaved changes will be discarded
- No confirmation prompt (you must re-enter changes if needed)
4.7 Troubleshooting Common Issues
Issue 1: "Invalid NPI Format"
Error Message: "NPI must be exactly 10 digits"
Solution:
- Ensure your NPI contains exactly 10 numeric characters
- Remove any dashes, spaces, or special characters
- Example: Use
1234567890instead of123-456-7890
Issue 2: "CCN Required for Production"
Error Message: "Cannot go live without a valid CCN"
Solution:
- Obtain your CMS Certification Number from your state survey agency
- Enter the 6-character CCN in the Agency Information tab
- Complete the Go Live process (Chapter 13)
Issue 3: "Tax ID Already in Use"
Error Message: "This Tax ID is already registered to another agency"
Solution:
- Each Tax ID can only be used by one agency
- If you're migrating from another system, contact Betasky Support to merge accounts
- If this is an error, verify the correct Tax ID with your business records
Issue 4: Logo Not Appearing
Problem: Uploaded logo doesn't show in the sidebar
Solution:
- Ensure the logo file is under 2 MB
- Use PNG or JPG format (SVG sometimes has rendering issues)
- Clear your browser cache and hard refresh (Ctrl+Shift+R or Cmd+Shift+R)
- Try a different image with a standard aspect ratio (3:1 or 4:1)
Issue 5: "Subscription Limit Reached"
Error Message: "Cannot add more users. Your plan allows a maximum of X users."
Solution:
- Upgrade to a higher subscription tier
- Contact sales@betaskyhealth.com
- Or remove inactive users to free up slots (see Chapter 8)